Introduction to Azure Cloud Shell

In my last couple of posts, I have described the remote management of Azure through the command line from what was essentially a fat (or thick) client. This gives you an awful lot of scripting and automation control over the platform by using either the Azure CLI or PowerShell through the PowerShell Az Module. This is perfect for most cases, but what if you are using an unsupported Operating System or you only have access to the browser (perhaps via a thin client)?
Thankfully a solution to this problem already exists and the good folks at Microsoft have made it easy for you to have full scripting ability over your Azure subscription through your web browser of choice! Enter Azure Cloud Shell…
Accessing Azure Cloud Shell
There are two ways to access Azure Cloud Shell, the first being directly through the Azure Portal itself. Cloud Shell PromptOnce authenticated, look to the top right of the Portal and you should see a grouping of icons and in particular, one that looks very much like a DOS prompt (have no fear, DOS is nowhere to be seen).

The second method to access Azure Cloud Shell is by jumping directly to it via https://shell.azure.com which will require you to authenticate to your subscription before launching. There is an ever so slight difference between each method. Accessing the Shell via the Azure Portal will not require you to specify your Azure directory context (assuming you have several) since your Portal will have already defaulted to one, whereas with the direct URL method that obviously doesn’t happen.
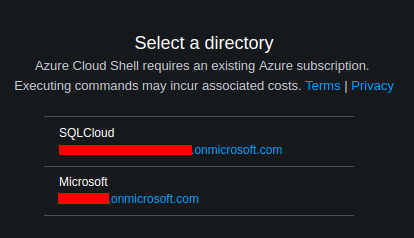
Select your Azure directory context through https://shell.azure.com
For both methods of access, you will need to select the command line environment to use for your Cloud Shell session (your choice is Bash or PowerShell) and the one you choose will partially depend upon your environment of preference.
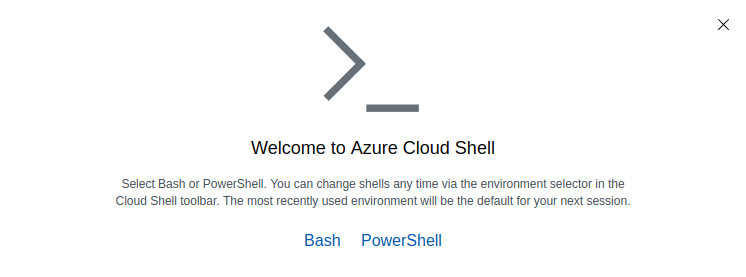
I will explain the difference later, however, for now, I am going to select the Bash environment.
Configuring Azure Cloud Shell storage
When using Azure Cloud Shell for the first time you will need to assign (or create) a small piece of Azure storage that it will use. Unfortunately, this will incur a very small monthly cost on your subscription.
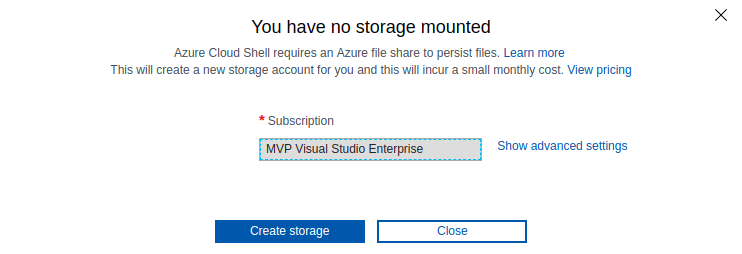
The storage is used to persist state across your Cloud Shell sessions. To get a little more visibility about what is going on I am going to click Show advanced settings:
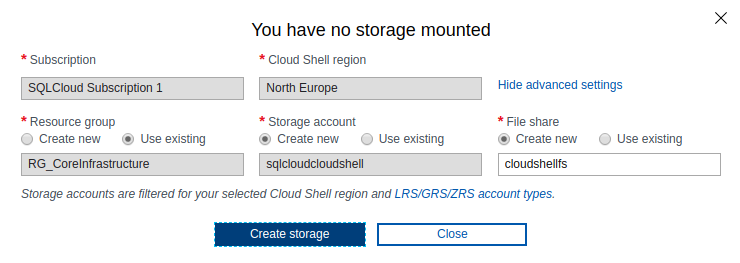
It is slightly disappointing that at the time of writing there are only 7 available Cloud Shell storage regions -which means that your Shell storage might not be able to live in the same region as your other resources (depending upon where they are).
Would it really matter that your Cloud Shell blob might live in a different region? I think it is probably very unlikely that you will consume egress data into your Shell region since it is management that is the purpose of Cloud Shell, not data staging, but I suppose you might want to bear in mind when you are scripting.
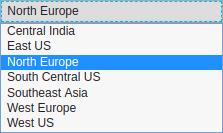
In my specific case (as you will see above) I decided to use an existing resource group named RG_CoreInfrastructure and within create a new storage account named sqlcloudcloudshell [sic] under the North Europe region and within this create a new cloudShellfs file share.
I don’t really like this dialog box since it is not very intuitive and allows you to submit incorrectly named or existing resources -both leading to creation failure. I’d rather they are caught and reported on at input time. For the record, the general rules for our Cloud Shell are that the storage account name needs to be in lowercase letters and numbers, must begin with a letter or number, be unique across Azure, and between 3 to 24 characters long (phew!). The file share can only contain lowercase letters, numbers, hyphens, and must begin with a letter or number and cannot contain two consecutive hyphens. It is a little frustrating, but you will get there in the end with a bit of trial and error! Whilst it is possible that you could pre-stage all of these things upfront and select an existing storage account (assuming it was in one of the 7 Cloud Shell regions), I was particularly interested in what Azure was going to provision, being mindful about not choosing storage that was more expensive than it needed to be. As it turns out, Azure created my storage as follows:
Performance/Access tier: Standard/Hot
Replication: Locally-redundant storage (LRS)
Account kind: StorageV2 (general purpose v2)
Other things of note were creation tagged this storage resource with the name-value pair of ms-resource-usage/azure-cloud-shell and set a file storage quota of 6GiB.
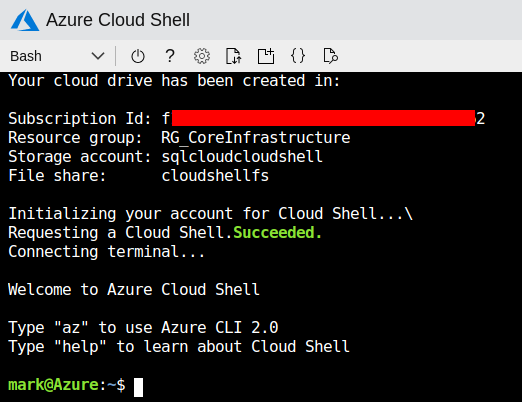
Running Azure Cloud Shell
Once setup has completed, the Azure Cloud Shell will launch as follows:
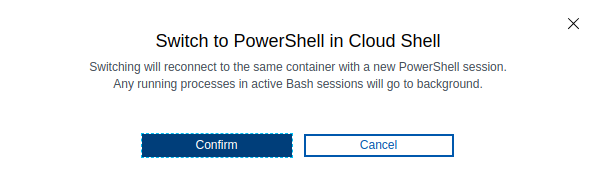
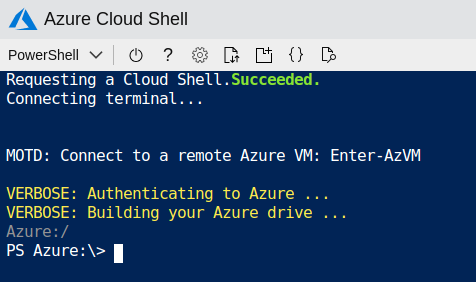
If you look at the menubar at the top of your Azure Cloud Shell window you will note that there is a dropdown currently set to Bash -which was the type of shell session chosen earlier. If we change this to PowerShell it will reconnect back into the Cloud Shell Container, this time using PowerShell as your entry point of choice.
Within a few seconds, you will now have entered into a PowerShell session.
Bash or PowerShell?
If you can remember when we first launched Azure Cloud Shell we had to select Bash or PowerShell as our environment of choice. The question is, which should you choose?
The real answer to this question is that it doesn’t really matter, and is simply down to your preference – especially since you can easily switch between the two. However, I would probably argue (especially for Linux fanboys like myself) that Bash (and therefore Azure CLI via Cloud Shell) is probably easier and more intuitive, and you could always directly enter a PowerShell Core for Linux session using the pwsh command in Bash (see also my previous post) if you wanted.
Whichever way you enter a PowerShell Cloud session, the Az module cmdlets are then directly available to you and you do not require any further configuration to your environment. I have specifically found that PowerShell does seem to favour more scripted hardcore Azure deployments since you can very easily use its OOP potential -such as assigning a resource object to a variable and accessing its properties/ methods/ collections programmatically through the object.
Basically, have a play and see what works for you.
Pre-Installed Software
The Azure Cloud Shell thankfully is also deployed with many pre-installed tools and runtimes. This is possibly a subject for another day, but just know that the following are available for your use all within your browser session(!!!):
- Development Runtimes available include PowerShell, .NET Core, Python, Java, Node.js, and Go.
- Editing tools installed include code (Visual Studio Code), vim, nano, and emacs.
- Other tools you can use are git, maven, make, npm, and many more.
- I fully expect these lists to consistently get bigger over time.
Summary
I hope you have found this post very useful and if you haven’t already done so please start testing Azure Cloud Shell now! It is the perfect place to quickly configure Azure using Azure CLI or the Azure PowerShell module (through scripting or simple commands) through your browser so that you don’t need to install those runtimes on your local machine.
Enjoy!